

Assembly says where each part goes on the toy. You can do most of it by dragging: the editor writes the lines for you. This page shows the toy and the text side by side.
Sew a part on
A part with no place yet stands beside the toy. Turn on Edit and drag it onto the toy.
In the text, a part is placed by a line under Assembly:.
Tail — sew to Body R16, BRead it as: the part, what it is sewn to, the round, and the place on that round.
Say where on a round
| You write | It means |
|---|---|
stitch 9 |
The 9th stitch of the round. |
B |
Where line B crosses the round. |
B+3 |
3 stitches after B. B-3 is 3 stitches before it. |
B+2 to B+5 |
A seam along those stitches. |
between B+2 and B+3 |
The gap between two stitches. Eyes go in gaps. |
Line B is a line you draw down a part, usually where the face is. Ears and eyes are then placed a few stitches either side of it. You declare it in the part:
Body:
Line B: halfway round
R1: sc 6To find a place, click a stitch on the toy. The card under the toy names it both ways: by count and from line B.
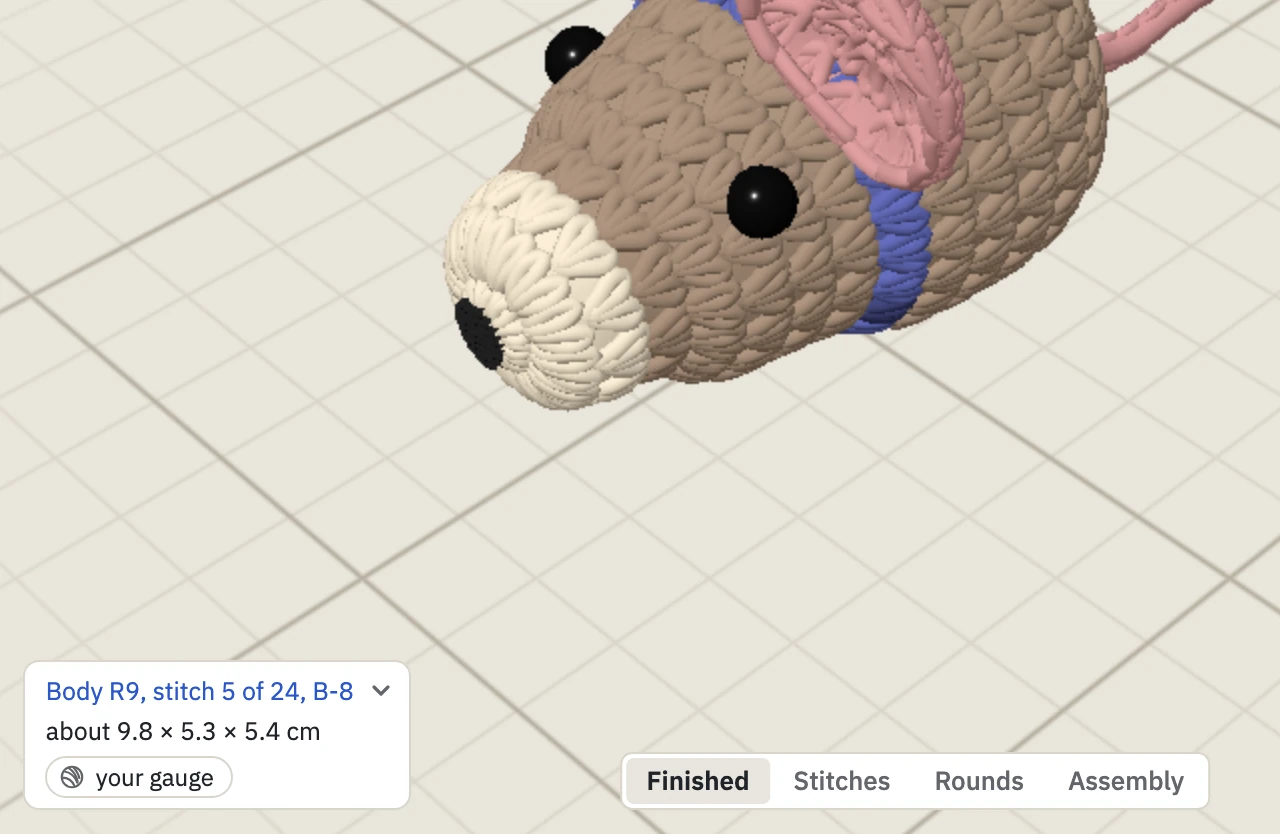
To see what is already placed, choose Assembly under the 3D view. Each place is coloured. Point at a part, an eye or a coloured stitch, and a label says it as the text writes it, such as Ears · R8.
Place a pair
Ears (2) — sew to Body R8, B-1 to B-3, mirrored(2) places both pieces. mirrored puts the second one on the other side of line B.
On the toy, drag one ear and the other follows. To move one alone, choose This one in its panel.
Make a seam wider
On the toy, open the Position tab and use Seam width, or drag the handle at either end of the seam.
In the text, lengthen the stretch: B-1 to B-3 becomes B-1 to B-4.
Point a part
Add a direction as the last words of the line. On the toy, it is Direction on the Position tab.
Ears (2) — sew to Body R8, B-1 to B-3, mirrored, leaning back
Tail — sew to Body R16, B, hanging down| Direction | The part points |
|---|---|
pointing out |
Straight out from where it is sewn. |
standing up |
Up, leaning out a little. |
leaning back |
Up, leaning back a little. |
leaning forward |
Up, leaning forward a little. |
leaning out |
Up and away from the body, like a V of wings. |
pointing forward |
Level, towards the face. |
pointing down |
Down and forward, its tip on the table if it reaches. |
hanging down |
Left to hang, like a tail. |
Three more spread a pair to the sides: leaning back and out, pointing forward and out, pointing back and out.
Sew along a round or up a column
A part is usually sewn along one round. Name two rounds and one place to sew it up a column instead.
Ears (2) — sew to Body R6 to R8, B+3, mirroredOn the toy, this is Up a column on the Position tab.
Add eyes
On the toy, open Add, choose Eyes and click where they go.
Eyes (2) — 6 mm safety eyes, Body R6, between B+2 and B+3, mirroredAdd embroidery
On the toy, open Add, choose a stitch and click where it goes.
Nose — embroider satin, 6 x 4 mm, in black, Body R1, stitch 4
Mouth — embroider a line in C, Body R5, B-2 to B+2satinis a filled patch. Its size is along the round, then across.lineis a thread from one point to the next.
More ways to place a part
| You write | It means |
|---|---|
Tail — sew to Body, back, lower |
A rough place, when you do not know the round yet. Use front, back, sides, top or bottom, then upper, middle or lower. |
Patch — sew flat to Body R8, B |
An open, unstuffed patch sewn flat around its outline. |
Head — sew to Body: top R12 B; bottom R6 B; sides R9 B+4 and B-4 |
An opening sewn on by its top, bottom and sides. |
Wing (2) — sew to Body R3 to R6, B+3, mirrored, by edge R5 stitches 1 to 6, face up |
A flat piece sewn on by one edge. face says which way it looks. |